Log Crossings Without Breaking Your Bike or Yourself

A complete, practical guide to crossing logs on an enduro bike without damaging your machine or getting hurt. It covers setup, line choice, body position, timing, step-by-step technique for small and big logs, safety, common mistakes, and what a clean crossing should feel like.
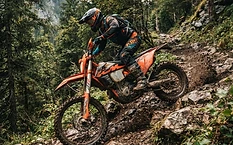
Log crossings are one of those skills that punish hesitation more than lack of strength. If you rush them, you can smash a wheel, hang the skid plate, whiskey-throttle into a tree, or get launched over the bars. If you break the move into simple parts and do them in order, they become predictable and safe.
Start With the Right Goal
Your goal is not to jump the whole bike dramatically over the log. Your goal is to let each wheel cross with as little impact as possible while you stay balanced, loose, and in control. A clean crossing protects your wheels, your suspension, your cases, and your body.
Think of a log crossing as three separate jobs:
- Lighten or lift the front wheel so it does not slam the log.
- Unweight the bike as the front goes over and the rear approaches.
- Let the rear wheel drive over without spinning, kicking sideways, or hanging the bike up.
If you remember that sequence, you stop treating every log like a panic obstacle.
Read the Obstacle Before You Touch It
Do not just stare at the middle of the log and charge. Stop and assess it, especially if the trail is wet, steep, or off-camber.
Look for these things:
- Height: Axle-high is different from boot-high. A tiny trail log can be rolled. A larger one needs deliberate front wheel lift and timing.
- Shape: Round, bark-on logs are slippery. Flat-cut timber can grab or deflect. Rotting wood can break unexpectedly.
- Angle to your line: Straight on is easiest. A diagonal crossing increases the chance the tires deflect and slide.
- Ground before the log: Mud, roots, a hole, or rocks can ruin your setup and body position before the bike even touches the obstacle.
- Ground after the log: If there is a downhill, a rock garden, or another log immediately after, you need to land composed, not with the front end dropped and the bike crossed up.
- Traction: Wet bark is one of the slickest surfaces on the trail. Treat it with respect.
If you have room, choose the straightest possible approach. Crossing at 90 degrees is safest because both tires meet the log square and are less likely to glance off.
Set Yourself and the Bike Up
You do not need a perfect race setup to cross logs well, but a few basics matter.
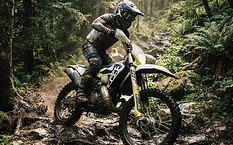
- Stand up, knees bent, neutral and relaxed.
- Cover the clutch with one finger or two, depending on your habit.
- Keep one or two fingers ready on the front brake if speed control is tight, but do not grab it at the log.
- Be in a gear that lets you drive smoothly without a frantic clutch dump. Usually that means first gear for slow, technical logs and sometimes second gear for flowing trail logs if traction is good and you have room.
- Keep your eyes up. Look beyond the log to your exit, not down at your front fender.
Your body position before the obstacle should be balanced, not hanging off the back already. Many riders make the mistake of starting too far rearward, which makes the steering vague and the timing late.
The Core Technique: Small to Medium Logs
For a small to medium log, you do not need a huge wheelie. You need timing.
Step 1: Approach slow enough to think, fast enough to carry momentum
Come in under control. Too slow and you stall on the face of the log. Too fast and you lose precision. You want a steady roll with mild drive.
Step 2: Compress the suspension lightly
Just before the front wheel reaches the log, load the bike slightly. This is not a massive bounce. You dip by pressing down through your feet and legs, then release.
Step 3: Lighten or lift the front wheel
As the fork rebounds, shift your hips slightly rearward and apply a smooth throttle input, often with a small clutch feed if needed. The goal is to make the front wheel feel light enough to touch high on the log or clear it completely.
For most trail logs, “light and high” is enough. You do not need to yank the bars. Pulling with your arms is weak and inconsistent. Let your legs, timing, and throttle do the work.
Step 4: Let the front wheel go over, then move back toward center
Once the front wheel reaches the top or far side of the log, do not stay hanging off the rear fender. As soon as the front is safely over, bring your body back toward neutral so the rear wheel can follow without slamming the skid plate into the wood.
Step 5: Unweight the rear as it contacts the log
This is the part riders forget. If you stay heavy on the pegs when the rear hits, the wheel smashes the log, loses drive, or kicks. As the rear wheel reaches the obstacle, get light through your legs. Think of making yourself briefly “float” above the bike.
Step 6: Feed drive, do not panic-throttle
Maintain enough throttle that the rear tire climbs. If traction is low, use the clutch to meter power instead of stabbing the throttle. A sudden burst on wet bark often spins the rear, and once it spins sideways, the bike can spit you off.
Step 7: Land straight and continue
After the rear clears, stay loose and let the bike settle. Do not instantly sit down or chop the throttle unless the trail demands it. Finish the move before you relax.
Technique for Bigger Logs
A bigger log needs the same sequence, just more deliberate. The front wheel usually needs to contact near the top or clear the log, and the rear must be driven over with more precision.
Step 1: Get square and commit
If the log is significant, your line matters even more. Approach as close to perpendicular as possible. Half-committed diagonal entries are how you dent rims and twist bars.
Step 2: Build a stronger front wheel lift
Use a firmer preload and a cleaner clutch-throttle release. You are not trying to loop out. You are trying to place the front wheel where it helps the bike climb instead of dead-stopping into the face.
A useful cue is this: front up first, bike forward second. If the front stays low and forward drive comes first, you hit the log like a battering ram.
Step 3: Touch the top or just beyond it
For a big log, the best front wheel contact is often near the crown or slightly over it. That reduces impact and lets the chassis pivot forward instead of rebounding backward.
Step 4: Absorb with your legs as the front comes down
Stay soft. If you lock your knees or tense your arms when the front lands on the back side, the bike will bounce and your timing for the rear is ruined.
Step 5: Drive the rear with clutch control
As the rear wheel meets the log, give it enough power to climb, but keep the power measured. On a two-stroke, that usually means careful clutch feed to keep the engine in the useful range. On a four-stroke, it often means rolling on cleanly without a big hit.
Step 6: Unweight at the exact moment the rear hits
This matters most on larger obstacles. Stand tall-light for an instant. You are not jumping off the bike; you are reducing the load on the rear so it can climb instead of punching into the wood.
Step 7: Recover immediately after the rear clears
Big logs often have ugly exits: holes, roots, turns, or another obstacle. As soon as the rear is over, return to an active neutral position ready for the next move.
If You Need a Trials-Style Double Blip
For very large logs, some riders use a double blip: one burst to lift the front, then a second controlled burst as the rear drives into the obstacle. This works, but it is easy to do badly. If you do not already understand clutch timing, do not make this your first method in the woods. A clean basic log technique does more for most enduro riders than chasing an advanced move too early.
Wet Logs, Slanted Logs, and Ugly Conditions
Conditions change the risk more than the log itself.
- Wet bark: Reduce aggression. Be smoother with throttle and clutch. A spinning tire on wet wood gives you almost nothing.
- Off-camber approach: Get even straighter before the log. If the bike is leaned when a tire touches slick wood, it can wash instantly.
- Multiple logs close together: Treat the group as one problem. Where will your wheels be after the first log? Do not celebrate too early.
- Logs with holes before them: Sometimes the front wheel drops into the hole, killing your preload. Roll in slower, stabilize, then lift.
- Embedded or muddy logs: These can act like polished rails. Respect them.
If traction is terrible, the safest choice may be to stop, inspect, and even manhandle the bike rather than insist on riding it cleanly.
Practice Progression That Actually Works
Do not start with a huge hardwood trunk on a sidehill. Build the skill in layers.
- Practice on a painted line or stick to learn timing and body movement.
- Move to a small log you can roll over with a light front wheel.
- Practice front wheel placement: touch high, not low.
- Add rear-wheel unweighting until the rear stops slamming.
- Progress to larger logs only when you can repeat the smaller ones calmly.
Repeat at low speed. Good log crossings look almost boring when done right.
Protect the Bike While You Learn
Even good riders clip logs. A few habits save damage.
- Use a solid skid plate.
- Keep your wheels true and tire pressure appropriate for terrain and tire type.
- Make sure your controls are positioned so you can stand comfortably and cover the clutch.
- Do not smash the throttle when hung up. Stop, reset, and lift or drag the bike off if needed.
The bike usually breaks when you keep trying to force a bad position.
Common Mistakes
- Charging too fast because you are nervous.
- Going too slow and arriving with no momentum.
- Approaching at an angle when a straighter line was available.
- Staring at the log instead of the exit.
- Pulling up with your arms instead of using timing, legs, and throttle.
- Leaning way back too early and making the bike hard to steer.
- Letting the front wheel hit low on the face of the log.
- Forgetting to move back toward center after the front clears.
- Staying heavy on the pegs when the rear wheel contacts the log.
- Chopping the throttle the moment the front gets over.
- Panic-throttling when the rear touches, causing spin and a sideways kick.
- Grabbing front brake on or just before the log.
- Attempting advanced techniques like a double blip without mastering the basic crossing.
- Trying to save every bad attempt instead of stopping and resetting.
Safety Rules That Matter
If the consequence is high, treat the obstacle with respect. A waist-high log with rocks on the landing is not the place to “just send it.” Walk it first if you are unsure.
Wear full protective gear. Keep your elbows loose so deflections do not wrench your shoulders. If the bike hangs up and starts to go wrong, step off early rather than staying attached to a bad outcome. In hard enduro, smart bails save more injuries than heroic saves.
Also remember fatigue. Log technique disappears fast when your legs are cooked and your clutch hand is blown up. That is when you revert to bad habits and break parts.
What Good Looks Like
A good log crossing feels controlled before it looks impressive. You approach straight, steady, and balanced. The front wheel gets light at the right moment, meets the log high or clears it, and the rear follows with a short, firm drive instead of a bang.
You do not get jerked backward, pitched over the bars, or kicked sideways. The bike stays mostly straight, the suspension does not spike harshly, and you land ready for whatever comes next. When you do it right, it feels quiet: one smooth motion, two wheels over, and you continue down the trail without drama.
Keep Reading


Join the Enduro University community
Create a free account to comment on this article, make race predictions, play daily trivia, build your virtual garage, enter the photo contest and climb the leaderboards.
Related Stories



Comments (0)
Be the first to comment.