How to Ride Technical Rock Sections

A practical, step-by-step guide to riding technical rock sections on an enduro bike, covering line choice, body position, traction, throttle and clutch control, braking, ledges, loose rock, recovery, and the mistakes that actually cause crashes and stalls.
How to Ride Technical Rock Sections
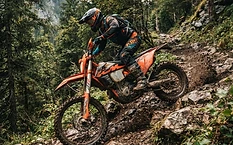
Rock sections expose every weakness in your riding. If your line choice is vague, your body position is late, or your clutch hand is abrupt, rocks will show it immediately.
The good news is that technical rocks are not random. Once you understand traction, timing, and where your weight needs to be, rock sections become predictable and much less tiring.
Understand What Makes Rocks Difficult
Not all rock sections ride the same, even if they look similar from a distance. Before you work on technique, understand what the bike is dealing with.
Rocks usually create four problems at once:
- Reduced and inconsistent traction - Grip changes from one tire contact patch to the next. Dry rough rock can have good traction. Smooth wet rock can feel like ice.
- Deflection - Your front wheel gets knocked off line when it hits edges, gaps, or angled stones.
- Momentum disruption - Every impact slows the bike or changes how the suspension moves.
- Rider hesitation - You shut the throttle, stiffen up, and make the bike harder to control.
Your job is not to fight every movement. Your job is to keep the bike balanced, keep drive to the rear tire, and let the chassis move underneath you without panicking.
Prepare Before You Enter the Section
A lot of rock-riding problems begin before the first rock.
Set your speed early
Do your major braking before the technical section starts. Entering too fast forces panic braking on unstable surfaces. Entering too slow often causes a stall or a dead stop in the worst place.
Aim for a speed that gives you:
- enough momentum to carry over holes and edges
- enough control to change line if needed
- enough engine response that a small throttle input actually moves the bike forward
Choose the right gear
In most technical rock sections, you want a gear that lets you use smooth throttle and fine clutch control without constant shifting. For many enduro bikes, that is often first or second gear depending on steepness, traction, and how tight the section is.
If the section is slow, steep, and trials-like, use the lower gear. If it is flowing with repeated rock hits, use the taller gear if it helps calm wheelspin and reduce abrupt engine braking.
Cover the controls correctly
You should already have:
- one or two fingers on the clutch
- a ready but light touch on the front brake if needed
- your right foot prepared to use the rear brake without stomping
In rocks, control is about small inputs. If your hands and feet are not ready, your reactions will be delayed and too big.
Read the Section Before You Ride It
If you can stop and inspect, do it. Walking a hard rock section is not weakness. It is efficient.
Look for these things:
1. The real line, not the obvious line
The most direct line is often not the best line. Look for:
- flat rock tops instead of sharp edges
- cracks or seams that hold the tires instead of pushing them away
- rounded transitions between rocks
- places where you can straighten the bike before a ledge
Avoid lines that force you to hit square edges with the front wheel while turning.
2. Traction changes
Notice whether the rock is:
- dry and rough
- smooth and polished
- wet
- covered in mud, moss, leaves, or sand
A clean rough boulder may offer more grip than loose baby-head rocks. A damp slab may offer less grip than hard dirt beside it.
3. Commitment points
Find the places where you must decide early:
- the approach to a step-up
- a narrow notch between rocks
- the exit line after a turn
If you arrive at one of these points still deciding, you are late.
Set Your Body Position
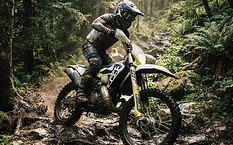
Your body position on rocks should be active, not frozen.
Stand in a neutral attack position
For most technical rock sections, stand with:
- knees bent
- hips loose
- elbows out
- head up
- weight centered over the pegs
Do not lock your legs straight. Do not sit unless the terrain specifically allows it and traction is easy. Standing lets the bike move under you and keeps impacts from going straight into your upper body.
Weight the pegs, not the bars
If you lean heavily on the handlebars, the front end becomes nervous and more likely to deflect. Keep pressure through your feet. Let your hands guide the bike rather than hold yourself up.
A simple check: if the front wheel skips sideways over a rock, can you stay loose and keep your chest from falling onto the bars? If not, you are overloading your hands.
Move fore and aft as needed
There is no single body position for all rocks.
- On flat choppy rocks, stay centered.
- On an uphill ledge, shift slightly forward enough to keep the front accurate, then unload it at the moment you lift it.
- On a downhill rock slab, move back enough to avoid pitching forward, but do not go so far back that you unweight the front into a slide.
Think of your body as balancing tire load, not posing.
Use the Right Throttle and Clutch Technique
The rear tire needs drive, but not shock.
Keep light, steady throttle
A slightly positive throttle stabilizes the bike. Chopping the throttle mid-section causes weight to pitch forward and makes the bike more likely to stall, deflect, or lose balance.
You do not need big throttle openings. You need continuity.
Slip the clutch instead of stabbing the throttle
In technical rocks, the clutch is your fine-adjustment tool. Use it to:
- smooth power delivery
- prevent a stall at very low speed
- add a short burst of drive for a step or gap
- control wheelspin on slick rock
Good riders often sound calm in rocks because the clutch is smoothing the engine. If your bike sounds like it is alternating between idle and rev limiter, your inputs are too abrupt.
Avoid wheelspin unless you mean it
Spinning the rear tire on dry rough rock can sometimes help clean the tire and keep momentum. Spinning it on wet polished rock usually sends you sideways.
If the rear starts spinning unexpectedly:
- reduce throttle slightly, not completely
- keep your body calm
- use clutch to reconnect power smoothly
A full panic shut-off often makes the bike stall or bounce off line.
Ride the Front Wheel Deliberately
Most riders get into trouble because they let the front wheel hit rocks badly.
Lighten the front over edges
You do not need a dramatic wheelie for most rock hits. You need to unweight the front wheel just before impact.
Do it like this:
- Approach in balance with light throttle.
- As the front reaches the obstacle, compress slightly with your legs.
- Add a small throttle-and-clutch drive as you extend.
- Let the front rise just enough to meet the top or far side more softly.
This keeps the front from smashing into the face of the rock and stopping the bike.
Look where the front needs to go next
Do not stare at the rock directly under your wheel. Look one to three bike lengths ahead depending on speed. Your peripheral vision can handle the immediate contact points. Your main vision should be finding the next stable patch.
If you look down too close, you ride late and tense.
Step-by-Step: Riding a Loose Rock Garden
Loose rocks require patience more than aggression.
- Approach with controlled momentum. Too slow and the front falls into holes. Too fast and the bike ricochets.
- Stand and stay loose. Let the bike dance underneath you.
- Keep a neutral to slight rearward bias. Enough to help the front skim, not so much that it wanders.
- Use steady throttle. Think of driving the rear tire through the section rather than poking at the ground with the front.
- Pick broad lines. Aim for clusters that create smoother overall travel, not individual rocks to avoid at the last second.
- Correct with your feet and hips. Small peg weighting changes help far more than wrenching the bars.
- Do not brake hard in the middle. If you must slow, use very light rear brake and engine control. Heavy front brake on loose angled rocks is how the front folds.
Step-by-Step: Climbing a Rock Ledge
This is where timing matters most.
- Straighten the approach. Even a small ledge is much easier if the bike is square to it.
- Choose a clean takeoff point. Avoid hitting from a hole or loose pile if possible.
- Set the speed before the ledge. You need enough momentum, but not a charge.
- Load and lighten the front. Just before the front touches, unweight it so it climbs instead of slamming.
- Drive as the rear reaches the face. This is the key moment. Use clutch and throttle to help the rear tire bite and climb.
- Stay with the bike. Do not yank on the bars or jump backward. Let the suspension work.
- Look immediately to the exit. Many failed ledges happen because the rider celebrates the front getting up and forgets to guide the rear and continue through.
On bigger steps, the same principles apply, but the timing becomes more deliberate. The front must land where the rear can follow, and your power pulse must help the rear tire climb instead of explode into wheelspin.
Braking and Turning on Rock
Braking
Brake early and lightly. On rock, especially downhill, the front tire has a smaller margin before it slides. Use both brakes, but with more finesse than force.
A good rule:
- do heavy braking before the rock section
- use maintenance braking inside it
- release the brake before major impacts or ledges
Braking while the front wheel is climbing an edge or crossing slick angled rock is a common cause of crashes.
Turning
Tight turns on rock require patience.
- Slow down before the turn.
- Get the bike as upright as possible for the grippiest part.
- Weight the outside peg.
- Use clutch to feed smooth drive.
- Accept a slightly wider, rounder arc if it preserves traction.
Trying to force a sharp turn on polished rock with a chopped throttle usually ends with the front pushing away.
If You Lose Balance or Momentum
Even good riders get offline in rocks. Recovery matters.
If the front deflects
Do not instantly fight it with a death grip. Stay loose, keep your eyes up, and guide the bike back with lower-body input and small handlebar corrections.
If you stall or nearly stall
Pull the clutch quickly, regain balance, and decide whether to restart in place or back up to a better line. Do not keep hammering the starter while half-falling downhill.
If you stop on a ledge or in a bad pocket
Sometimes the smartest move is to dismount, reposition, and reset. Technical riding includes judgment. Wasting energy in a hopeless half-balance often ends in a crash or dropped bike.
Practice Drills That Actually Help
Skill in rocks comes from repeatable drills, not random survival rides.
Front-wheel unweight drill
Find a small embedded rock or stick. Ride at low speed and practice lightening the front wheel over it without changing direction or over-revving the bike.
Slow clutch-control drill
On flat ground, ride standing at walking speed using clutch slip and tiny throttle inputs. Keep the bike balanced and smooth. This transfers directly to rock sections.
Straight-line ledge drill
Practice on a small, safe step with good runoff. Repeat the same ledge until you can approach, unweight the front, drive the rear, and exit without drama.
Loose-garden drill
Ride the same short rock patch several times. First focus only on vision. Then only on throttle smoothness. Then only on staying light on the bars. Isolating variables speeds learning.
Common Mistakes
- Entering too fast, then grabbing brake in the middle of the section
- Entering too slow and trying to fix it with a big throttle stab at the obstacle
- Looking down at the front fender instead of through the section
- Sitting too much and getting pitched by every impact
- Locking your knees and arms so the bike cannot move underneath you
- Hanging on the handlebars for support
- Chopping the throttle every time the bike moves sideways
- Hitting ledges while turning instead of straightening the bike first
- Using too much clutch dump and not enough clutch slip
- Letting the rear wheel spin wildly on slick rock
- Trying to avoid every single rock instead of choosing a smooth overall line
- Celebrating too early after the front wheel clears an obstacle and forgetting the rear wheel still has to climb it
- Refusing to stop and inspect a section that would be obvious on foot
- Fighting a bad line when a small reset would save energy and reduce risk
What Good Looks Like
Good rock riding looks quieter than most riders expect. The bike moves around, but you do not look surprised by it. Your upper body stays calm, your eyes stay up, and your hands never seem busy.
From the seat, it feels like controlled momentum. The tires are finding grip, the suspension is working, and you are making small adjustments instead of emergency reactions. You are not trying to overpower the section. You are keeping balance, feeding traction, and placing the wheels where they have the best chance to keep moving.
When you get it right, the section feels slower and simpler than it looked from the outside. You finish with your breathing under control, your line mostly where you intended, and enough energy left to do it again the same way.
Keep Reading


Join the Enduro University community
Create a free account to comment on this article, make race predictions, play daily trivia, build your virtual garage, enter the photo contest and climb the leaderboards.
Related Stories



Comments (0)
Be the first to comment.